Leave Your Message

How to Choose the Right Refrigerant Filter Drier?

Choosing the right Refrigerant Filter Drier is a small decision with system-wide consequences. It affects moisture control, acid removal, particle capture, and compressor protection. A poorly matched drier may restrict flow, especially after contamination or a retrofit. The result can be a sweating liquid line, unstable superheat, or an expensive compressor failure.

Andy Pearson, a respected refrigeration engineer and former Group Engineering Director at Star Refrigeration, has stated, “Good refrigeration design begins with understanding the system, not merely selecting components.” That principle applies directly here. Technicians should examine the refrigerant type, system capacity, connection size, pressure rating, and expected operating temperature. A drier for a compact R-404A freezer may not suit an R-410A heat pump. The label matters.

The internal desiccant also deserves attention. Molecular sieve blends can remove moisture efficiently, while other materials may target acids or waxes more effectively. Check the manufacturer’s compatibility data. Do not rely only on physical size. A larger shell is not automatically better.

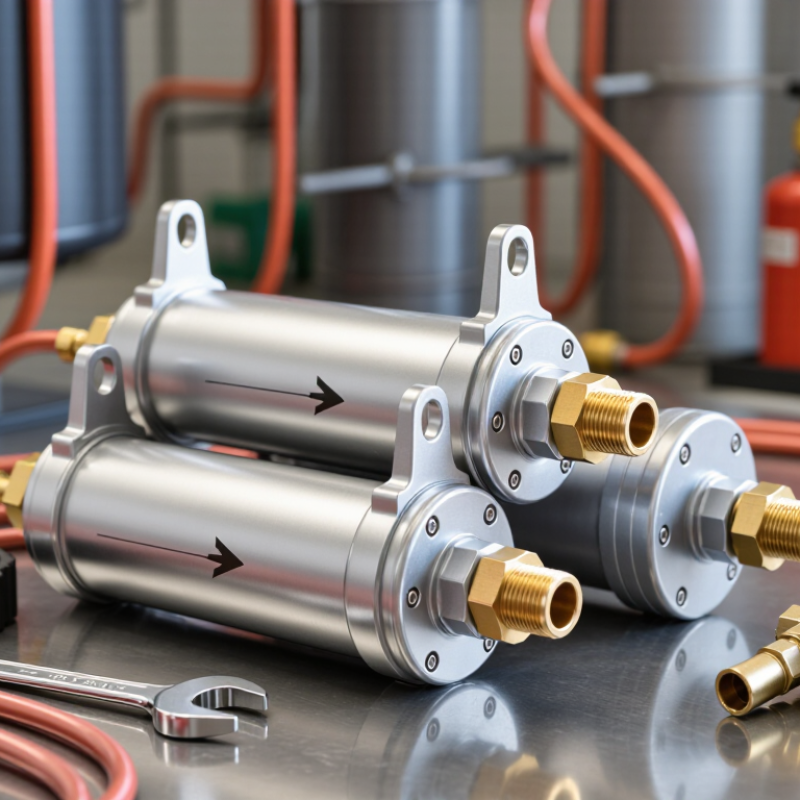
Installation experience reveals another detail. A drier installed backward can create trouble quickly. Arrow direction must match liquid flow. Brazing should limit heat exposure, and the system should be evacuated properly afterward. This step is often rushed.

There is no perfect selection for every circuit. Field conditions vary. Older systems may hide contamination. Newer refrigerants may change material requirements. Even experienced technicians can overlook pressure drop. This guide examines the practical checks behind a reliable Refrigerant Filter Drier choice, while acknowledging an uncomfortable truth: component selection is only as good as the information used.
How to Choose the Right Refrigerant Filter Drier?

What a Refrigerant Filter Drier Is and Why It Matters

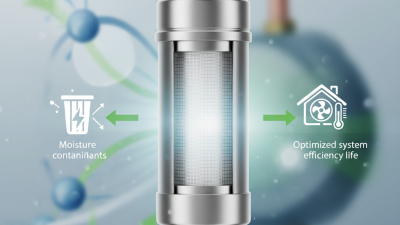
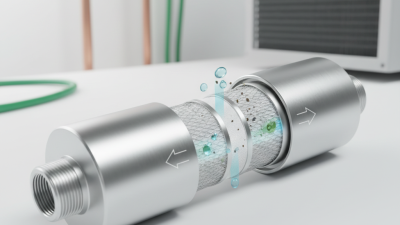
A refrigerant filter drier is a small sealed component installed in a refrigeration or air-conditioning circuit. It removes moisture, acid, dirt, and metal particles from circulating refrigerant and oil. Inside, a desiccant core traps water before it can freeze near an expansion device. That detail matters. Ice can restrict flow, raise pressure, and cause unstable cooling. The drier also captures debris left after brazing or compressor wear.

In practical service work, a system may look clean while holding damaging moisture. A technician might see normal suction pressure today, then find corrosion months later. Moisture can react with refrigerant and oil, forming acids that attack motor windings and copper surfaces. A blocked drier creates a noticeable temperature drop across its shell. It can also starve the evaporator. I once treated a pressure difference as a minor issue. It was not. The restriction had already reduced capacity.

Choosing the right drier requires matching refrigerant compatibility, connection size, flow capacity, and system type. Check technical data, not only the pipe diameter. A drier rated for a small comfort system may not suit a low-temperature rack. Consider moisture capacity, pressure rating, installation direction, and cleanup requirements after compressor burnout. Use clean tubing practices, limit open exposure, and replace the drier after major repairs. This is where judgment matters. Oversizing is not always better, and a convenient substitute can create hidden pressure loss. Record inlet and outlet temperatures after startup. Those readings often reveal more than appearance.


How to Choose the Right Refrigerant Filter Drier?

What a Refrigerant Filter Drier Is and Why It Matters

A refrigerant filter drier removes moisture, acids, and solid contaminants from a refrigeration circuit. The refrigerant’s operating temperature and pressure help determine the required drier size, shell rating, flow capacity, and desiccant compatibility. Refrigerants with lower boiling points generally operate in lower-temperature or higher-pressure applications, making correct component selection especially important.

Chart data shows approximate normal boiling points at atmospheric pressure for commonly used refrigerants. Values are rounded and intended for comparison; actual system selection must follow the equipment manufacturer’s specifications and applicable safety standards.

How to Match the Drier Type to the Refrigeration System

How to Choose the Right Refrigerant Filter Drier?

Matching the drier to the refrigeration system requires more than checking pipe size. Start with the refrigerant, lubricant, operating pressure, and expected moisture load. A liquid-line drier is usually installed before the expansion device, where it captures moisture, particles, and acid. Systems using polyol ester oil need extra care because this oil absorbs moisture quickly. The drier must also tolerate the refrigerant’s pressure and temperature range.

For compact systems, a sealed solid-core drier often provides practical protection with low maintenance. Larger systems may need a replaceable-core housing, especially when contamination is likely after compressor failure. Choose a core designed for moisture removal, acid control, or both. Activated alumina can help with acid, while molecular sieve material targets water. Do not select by habit. The wrong core can increase pressure drop or remove useful oil additives.

Heat pumps and reversing systems require a bi-flow drier. Its internal design must maintain filtration in both directions. Suction-line driers are useful after a burnout or severe contamination event, but they are not always permanent installations. Check the manufacturer’s capacity tables, pressure-drop data, and installation direction. Field measurements matter too. A clean-looking system may still hold moisture inside copper lines. Dry nitrogen during brazing helps, but it does not replace evacuation. I have seen driers selected correctly yet installed backward. Small details decide performance.

How to Select the Correct Size, Capacity, and Connection

Choosing the right refrigerant filter drier starts with the system’s actual operating conditions. Do not size it by pipe diameter alone. Check refrigerant type, cooling capacity, flow direction, and acceptable pressure drop. A drier rated for one refrigerant may not perform similarly with another. Confirm its moisture-removal capacity from reliable technical data.

Select a model that matches the liquid or suction line application. Liquid-line driers usually need strong moisture and acid protection after installation or compressor replacement. Suction-line models often require higher flow capacity and low pressure drop. Compare the manufacturer’s capacity rating at your design temperature and refrigerant. Oversizing is not always harmless. It may increase cost and installation space without improving protection. Undersizing can restrict flow, especially during peak demand.

Tips: Measure the existing tubing before ordering. Connection size, connection style, and flow direction must all match. Sweat, flare, and threaded connections are not interchangeable without suitable components. I still recheck these details after selecting the body size. A small mismatch can cause leaks or force unnecessary field modifications. Consider bi-flow designs for reversible systems. Also verify pressure rating, temperature range, and compatibility with the system oil. Installation cleanliness matters. Open the drier only before brazing or connection, and keep the system sealed as much as possible. Performance data can be incomplete, so compare more than one operating condition before making the final choice.

How to Check Moisture, Contaminant, and Pressure Requirements

How to Choose the Right Refrigerant Filter Drier?

Moisture, contaminants, and pressure requirements should guide your filter drier choice. A wrong selection can restrict flow or leave damaging water inside the circuit. During service work, I check the system history before opening any connection. A recent compressor failure may indicate acid, carbon, or metal debris. Do not rely on appearance alone. Clean-looking tubing can still hold moisture.

Measure moisture with a calibrated electronic tester when possible. A sight glass may show bubbles, but it cannot confirm dry conditions. Check for acid after a burnout or severe overheating event. Inspect removed components for copper oxide, sludge, and dark oil. Choose a drier with suitable capacity for the refrigerant, oil, and expected system load. Compatibility matters more than physical size.

Tips:

Compare the drier’s rated working pressure with the system’s maximum operating pressure. Confirm its flow capacity at the actual refrigerant temperature. Check the pressure drop across the drier after startup. A small pressure difference is expected, but a rising drop suggests blockage. Replace the drier if it becomes saturated or contaminated. I sometimes overfocus on moisture and miss debris loading. That mistake is avoidable. Record readings before and after installation, then review them honestly. Manufacturer data sheets remain essential, because field assumptions are not always correct.

How to Install, Replace, and Maintain a Filter Drier

Choosing the right refrigerant filter drier starts with system requirements, not appearance. Check the refrigerant type, cooling capacity, connection size, and permitted pressure range. The drier must match the system’s flow direction. An oversized part may restrict performance, while an undersized part can saturate quickly. Always confirm the manufacturer’s technical data and local service requirements.

Installation requires clean, careful work. Recover the refrigerant safely before opening the circuit. Keep the new drier sealed until installation, because its desiccant absorbs moisture from air. Cut the tubing squarely and remove burrs. During brazing, use a low-flow nitrogen purge to reduce internal oxidation. Follow the arrow on the shell. A reversed drier can obstruct refrigerant flow.

Small details matter.

After brazing, inspect every joint, pressure-test with an approved inert gas, and repair leaks before evacuation. Pull a deep, stable vacuum with suitable instruments, then recharge the system by measured weight. Replace a filter drier after major component failure, moisture contamination, or repeated pressure drop. Check for frost, unusual temperature differences, and restricted flow during operation. In field service, a rushed replacement often creates a second problem. I have also seen clean-looking tubing hide contamination, so visual inspection alone is not enough. Record the replacement date, refrigerant type, and operating readings for the next technician.

How to Choose the Right Refrigerant Filter Drier? - How to Install, Replace, and Maintain a Filter Drier

Practical selection, installation, replacement, and maintenance guidance for refrigeration and air-conditioning systems.
Decision or Service Area Recommended Data Dimension Practical Guidance Important Check
Refrigerant compatibility Refrigerant type and oil compatibility Select a drier that is specifically rated for the refrigerant and lubricant used in the system, including mineral oil, alkylbenzene, POE, or PAG where applicable. Never assume that a drier suitable for one refrigerant or oil is suitable for another. Confirm the component rating before installation.
System application Liquid-line or suction-line use Use a liquid-line drier for moisture, acid, and particulate control in the liquid line. Use a suction-line cleanup drier after burnout, compressor failure, or serious contamination. A suction-line cleanup drier is normally temporary and should be removed or replaced according to the system-cleanup procedure.
Desiccant selection Moisture and acid adsorption performance Common desiccants include molecular sieve, activated alumina, and blended formulations. Molecular sieve provides strong moisture adsorption, while activated alumina is useful for acid adsorption. Use the desiccant blend recommended for the refrigerant, oil, system type, and contamination level.
System capacity Refrigeration capacity and mass flow Choose a drier with a rated capacity equal to or greater than the system requirement at the actual evaporating and condensing conditions. Capacity ratings vary with refrigerant, pressure drop, temperature, and moisture conditions. Use the technical rating table for the selected component.
Connection size Tube outside diameter and connection style Match the drier connection size and type to the existing tubing. Common connection methods include soldered, brazed, and flare fittings. An incorrect connection can restrict flow, leak, or require unnecessary adapters that increase pressure drop.
Maximum working pressure Pressure rating and operating temperature The drier must have a maximum working pressure higher than the system's possible operating pressure, including the expected ambient and shutdown conditions. Check the nameplate, product documentation, and applicable local safety requirements before installation.
Flow direction Inlet and outlet orientation Install a one-way drier with the refrigerant flowing in the direction indicated by the arrow. Bi-directional systems require a drier designed for reverse flow. Incorrect orientation may reduce filtration performance or cause excessive pressure drop.
Physical installation location Accessibility and line placement Install the liquid-line drier downstream of the condenser and before the metering device. Position it where it can be inspected and replaced safely. Avoid unsupported tubing, excessive vibration, and locations exposed to damaging heat or mechanical stress.
Preparation before installation Moisture, debris, and refrigerant control Use a clean, dry replacement component. Keep the sealed package closed until installation and protect open tubing from air and dust. Recover refrigerant with approved equipment. Do not vent refrigerant, and follow applicable regulations and safety procedures.
Removal procedure Isolation and contamination prevention Recover the refrigerant, isolate the section where possible, remove the old drier, and cap or seal open tubing promptly. A used drier should not normally be reused because its desiccant may be saturated or contaminated.
Brazing or soldering Heat protection and internal cleanliness Use a heat shield and flow dry nitrogen through the tubing at a low, controlled rate during brazing to reduce internal oxidation. Do not overheat the drier. Follow the component's installation instructions and use suitable personal protective equipment.
Leak testing Joint integrity and pressure safety After installation, pressure-test the repaired circuit with an approved dry, non-reactive test gas at a pressure permitted by the equipment and local regulations. Never use oxygen or compressed air for pressure testing a refrigerant system.
Evacuation Vacuum level and vacuum stability Evacuate the system with suitable hoses, a calibrated micron gauge, and a vacuum pump. Hold the vacuum long enough to confirm that moisture removal is effective and no significant leak remains. A pressure gauge alone cannot verify deep evacuation or accurately identify residual moisture.
Charging after replacement Refrigerant quantity and system performance Recharge with the specified refrigerant and measure the charge by the method required for the equipment. Check operating pressures, superheat, subcooling, and temperature performance as applicable. Do not use pressure alone to determine the correct charge.
Replacement timing Moisture, acid, pressure drop, and service history Replace the drier whenever the sealed refrigeration circuit is opened, after major component replacement, or when moisture or acid contamination is suspected. Replace sooner if the moisture indicator changes color, pressure drop increases, or the system has experienced compressor burnout.
Routine maintenance Visual inspection and operating readings Inspect for corrosion, oil residue, vibration damage, frost patterns, abnormal temperature differences, and signs of leakage. Review pressure and temperature readings during scheduled service. A temperature difference across a drier can indicate restriction, but it must be interpreted with system load and operating conditions.
Moisture indicator Color indication and moisture trend If an indicator is installed, compare its color with the legend provided for that specific component and monitor whether the condition improves after evacuation and operation. Indicator colors are not universal. Use the correct legend and confirm abnormal readings with proper testing.
Final commissioning Leak-free operation and documentation Record the replacement date, refrigerant type and charge, evacuation results, operating readings, and any contamination found during service. Return the system to service only after confirming safe electrical operation, correct airflow, stable temperatures, and no refrigerant leaks.
Safety note: Refrigerant recovery, pressure testing, evacuation, charging, and brazing should be performed by qualified personnel using approved tools and procedures. Always follow the equipment documentation and applicable laws.