Leave Your Message

How to Choose a Liquid Line Filter Drier in 2026?

Choosing a Liquid Line Filter Drier in 2026 requires more than matching pipe size. Modern refrigeration systems use lower-GWP refrigerants, sensitive electronic controls, and synthetic lubricants. Each component reacts differently to moisture, acids, wax, and installation debris. A small selection mistake can increase pressure drop, reduce cooling capacity, or leave the compressor vulnerable.

Refrigeration educator John Tomczyk puts the practical value plainly: “A filter-drier is cheap insurance for a refrigeration system.” That principle still matters, but insurance only works when the coverage fits. Engineers should check refrigerant compatibility, system capacity, maximum working pressure, moisture-removal performance, acid protection, and the manufacturer’s recommended installation position. A core-type model may suit a larger commercial circuit, while a sealed model may fit a compact residential unit. Not every “universal” product is truly universal.

Field experience also changes the decision. A clean, dry copper line is not the same as a system exposed to rain, brazing oxides, or a compressor burnout. Measure the pressure drop. Inspect the sight glass. Consider the service environment. These details often reveal more than a product label.

This guide explains how to compare filter-drier types, sizing methods, connection options, and 2026 refrigerant considerations. It also examines common selection errors, including choosing by diameter alone. That shortcut seems convenient. It can be expensive. No single filter drier solves every contamination problem, and even expert recommendations deserve verification against current manufacturer data.
How to Choose a Liquid Line Filter Drier in 2026?

What a Liquid Line Filter Drier Does in a Refrigeration System

How to Choose a Liquid Line Filter Drier in 2026?

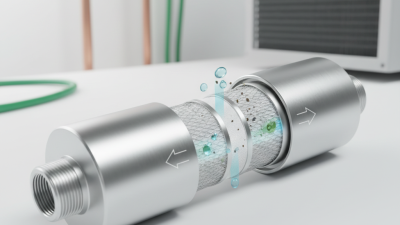
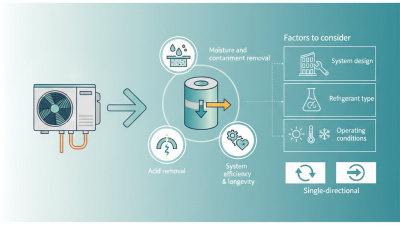
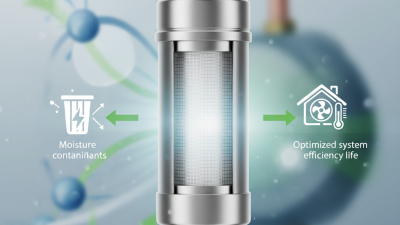
A liquid line filter drier protects a refrigeration system from moisture, acids, and solid contaminants. It sits in the liquid line, commonly before the expansion device. Its desiccant captures water that can freeze, corrode metal, or react with refrigeration oil. The filter element also traps particles from installation, brazing, or component wear. This small component can protect valves, compressors, and heat exchangers from expensive damage.

In field service, a restricted drier often reveals itself through temperature differences across its shell. A noticeable pressure drop may indicate contamination or incorrect sizing. Choose a drier according to refrigerant type, oil compatibility, system capacity, and expected operating temperature. Check the manufacturer’s technical data, not only the connection size. A drier that looks suitable may still limit flow during peak load. After a compressor burnout, a standard replacement may be inadequate; the system usually needs deeper cleaning and closer monitoring.

Tips: Install the drier in the correct flow direction. Keep its caps sealed until fitting. Use clean tubing and dry nitrogen during brazing. Record inlet and outlet temperatures after startup. Replace the drier if moisture remains high or pressure drop increases. Do not treat it as a permanent cure. I have seen technicians blame the drier when the real fault was poor evacuation. That mistake is easy to repeat. Measure, question, and verify.
How to Assess Refrigerant, System Type, and Contamination Risks

How to Choose a Liquid Line Filter Drier in 2026?

Selecting a liquid line filter drier starts with the refrigerant, not the cabinet size. Check chemical compatibility, operating pressure, and temperature range carefully. Different refrigerants may require different desiccant materials and internal flow capacities. Confirm the connection size, because a restriction can raise pressure drop and reduce system efficiency. A drier should also match the system type, whether it serves refrigeration, air conditioning, or a heat pump. I have seen installation problems caused by choosing a familiar size instead of checking actual flow conditions.

Tips: Review the equipment data sheet. Estimate the maximum refrigerant flow. Consider startup conditions, not only normal operation. Replace the drier after major repairs or compressor burnout. Keep it sealed until installation.

01

Contamination risk should guide the final choice.

Moisture can freeze near expansion devices, while acid may damage winding insulation and metal surfaces. Copper particles, welding scale, and degraded oil can also restrict valves. A high-capacity model may help after moisture exposure, but it cannot correct poor evacuation or careless brazing. That distinction matters. In practice, technicians should inspect sight glass conditions, pressure readings, and service history together. Do not trust one symptom alone. A clean-looking system may still contain dissolved moisture. When uncertainty remains, laboratory oil testing can support a safer decision.

How to Select the Correct Filter Drier Size and Connection Type

Choosing a liquid line filter drier starts with system conditions, not pipe diameter. The correct size must match refrigerant type, cooling capacity, operating temperature, and acceptable pressure drop. A drier rated only by nominal connection size can restrict flow when the system operates near peak load. The 2022 ASHRAE Handbook—Refrigeration identifies pressure drop and moisture control as key factors in liquid-line component selection.

Capacity should be checked at the design condition, not only at average operation. Compare the manufacturer’s rated capacity with the system’s refrigeration load and allow practical margin. The International Energy Agency reported that global cooling demand could more than triple by 2050. Small restrictions may therefore create larger energy penalties across aging equipment. Too large is not always better. Oversizing can increase cost and may reduce effective contaminant capture during low-flow operation.

Connection type must match the existing tubing, installation method, and service requirements. Sweat, flare, and threaded connections require different tools and sealing practices. A mismatched connection can leak after vibration or thermal cycling. Field technicians should also verify flow direction, shell pressure rating, and replaceability before installation. The 2023 Global Cooling Watch report links efficient cooling design with major emissions reductions, but component choices still depend on real operating data. I would recheck the selection after startup, because calculated conditions are sometimes cleaner than the actual system.

Which Filter Media and Features Match Your Application

How to Choose a Liquid Line Filter Drier in 2026?

The filter media should match the system’s main risk. Molecular sieve media removes moisture from the refrigerant circuit. It suits systems using moisture-sensitive refrigerants and lubricants. Activated alumina helps capture acids after motor burnout or severe overheating. Some blended cores combine both functions. Carbon may help reduce waxes and certain contaminants, but it should not replace proper cleaning.

Size the drier for the required refrigerant flow, not only the pipe diameter. A large shell can still create excessive pressure drop if its internal passage is restrictive. Check published water-capacity, acid-capacity, and flow data at the expected temperature. Confirm compatibility with the refrigerant, oil, seals, and operating pressure. Small details matter.

Look for a clear flow-direction mark, strong corrosion-resistant housing, and reliable connection design. A moisture indicator can reveal changing system conditions, but it needs correct installation and regular inspection. Service access is valuable when contamination is possible. Replaceable-core designs may reduce waste in larger systems, although they demand careful sealing during maintenance. Bi-directional models can fit reversing systems, but only when their pressure and filtration performance are verified in both directions.

Oversizing is not always safer. It may slow oil movement or conceal a developing problem. Undersizing can cause pressure loss and reduced capacity. Selection should follow measured load, expected contaminants, manufacturer test data, and applicable safety standards. A filter drier is only one part of a clean, dry installation.

How to Choose a Liquid Line Filter Drier in 2026?

Which filter media and features match your application?

How to read the chart: The 0–5 index is a practical engineering screening scale based on the typical function of each media type, not a manufacturer capacity rating. Molecular sieve is generally preferred for moisture control, activated alumina is commonly selected for acid cleanup, activated carbon helps adsorb oil and organic contaminants, and fiber or cellulose elements provide strong particulate filtration.
Select the final filter drier by matching the media combination, refrigerant and oil compatibility, system capacity, pressure drop, connection size, and required filtration level. Follow the equipment manufacturer’s installation and replacement requirements.

How to Install, Test, and Replace a Liquid Line Filter Drier

How to Choose a Liquid Line Filter Drier in 2026?

Choosing a liquid line filter drier starts with the system, not the shelf label. Match the refrigerant, oil type, flow capacity, connection size, and pressure rating. A drier that is too small can restrict flow. One that is oversized may not provide better protection. Check the manufacturer’s technical data and the equipment service manual. I also inspect the arrow showing refrigerant direction. It is easy to overlook.

Installation requires clean workmanship. Recover the refrigerant safely, isolate the circuit, and follow local service requirements. Cut the liquid line with minimal exposure to air. Keep the new drier sealed until installation. During brazing, use a low-flow dry nitrogen purge to reduce internal oxidation. Install the drier in the correct direction, then support the tubing to prevent vibration. Small errors matter.

Testing should include a dry nitrogen pressure test, leak inspection, and evacuation with a calibrated micron gauge. Do not rely only on a vacuum pump’s running time. After charging, compare the inlet and outlet temperatures across the drier. A noticeable temperature drop may indicate restriction, especially with abnormal system pressures. Replace the drier after severe moisture exposure, a compressor failure, or suspected contamination. Remove it if the core is restricted. I would still recheck airflow, charge, and measurements before blaming the drier.

How to Choose a Liquid Line Filter Drier in 2026? — How to Install, Test, and Replace a Liquid Line Filter Drier
Stage Decision or Task Recommended Practice Verification Points
1. Select Refrigerant compatibility Choose a filter drier whose desiccant, shell, seals, and pressure rating are approved for the specific refrigerant and lubricant used in the system. Do not assume that a drier suitable for one refrigerant is automatically suitable for another. Confirm the refrigerant designation, oil type, allowable working pressure, and temperature range on the product technical data before installation.
2. Select Connection size and type Match the drier connection to the liquid-line tubing and system design. Common options include solder or sweat connections and SAE flare connections. The connection should not reduce the intended liquid-line flow area. Measure the outside diameter of the tubing and verify the connection specification. Use an adapter only when it is rated for the refrigerant circuit and pressure.
3. Select Capacity and pressure drop Select capacity according to the system’s refrigerant, evaporating or condensing conditions, line size, and required flow rate. A larger physical shell is not automatically better if it creates unnecessary cost or installation constraints. Use the capacity and pressure-drop tables for the actual refrigerant. Excessive pressure drop can reduce subcooling available at the metering device and may contribute to flash gas.
4. Select Desiccant and contamination control Use a solid-core or molded desiccant design appropriate for moisture, acid, wax, and particulate control. For a compressor burnout or severe contamination event, use a cleanup drier arrangement specified for acid removal and plan follow-up testing. If the system has experienced a burnout, inspect and clean the circuit, replace contaminated components where required, and test for acid or decomposition products after operation.
5. Select Moisture indication Where practical, install a liquid-line sight glass with a moisture indicator downstream of the drier. The indicator provides a useful field signal but does not replace evacuation, leak testing, or refrigerant analysis. Interpret the indicator according to its color legend and operating conditions. Allow the system to stabilize before deciding whether moisture remains.
6. Install Correct location and flow direction Install the drier in the liquid line, normally downstream of the condenser or receiver and upstream of the metering device. Follow the arrow marked on the shell; a bidirectional drier must be specifically designed for heat-pump reversing operation. Verify that the flow arrow matches normal cooling operation and that the drier is accessible for future replacement.
7. Install Brazing and heat protection For sweat connections, use clean, properly prepared tubing and protect the drier from excessive heat. Flow dry nitrogen through the tubing while brazing to reduce internal oxide formation. Keep the nitrogen flow low enough to avoid turbulence and avoid directing the torch flame at the drier body. Allow the joint to cool before exposing the drier to operating pressure.
8. Install Leak and pressure testing After installation, pressure-test the circuit with clean, dry nitrogen or another approved inert test gas. Never use oxygen or compressed air because oxygen can create a serious fire or explosion hazard in a refrigerant system. Use a calibrated regulator and stay below the lowest rated pressure of the system components. Check all joints with an approved leak-detection method and confirm that pressure remains stable.
9. Test Evacuation and dehydration Evacuate the system with a suitable vacuum pump, large-diameter evacuation hoses, and properly rated core tools. A commonly used commissioning target is 500 microns or lower, provided the equipment and local requirements allow it. Isolate the pump and perform a standing-vacuum test. A rapidly rising micron level can indicate a leak, trapped moisture, inadequate hoses, or an isolated component still releasing vapor.
10. Test Operating performance Charge the system using the specified refrigerant and operating method. After stabilization, check liquid-line temperature, pressure, subcooling, evaporator superheat, compressor current, and system airflow or water flow as applicable. A temperature difference across the drier that is consistently higher than expected may indicate restriction. Interpret readings only after the system reaches stable load conditions.
11. Replace Replacement triggers Replace the drier after a major refrigerant circuit opening, compressor burnout, significant moisture contamination, a confirmed restriction, or when the moisture indicator and diagnostic readings show continuing contamination. Repair the source of contamination or restriction first. Replacing the drier without correcting the underlying problem may lead to another blockage or moisture issue.
12. Replace Replacement procedure Recover the refrigerant according to applicable regulations, isolate the circuit, remove the old drier, install a correctly rated replacement, pressure-test, evacuate, and recharge or weigh in the refrigerant as required. Record the replacement date, refrigerant type, pressure-test result, final micron reading, charge amount, temperature readings, and any acid or moisture test results.
Safety note: Installation, recovery, pressure testing, evacuation, and refrigerant charging should be performed by qualified personnel using procedures, tools, pressure limits, and environmental requirements applicable to the equipment and jurisdiction.